Installation Steps:
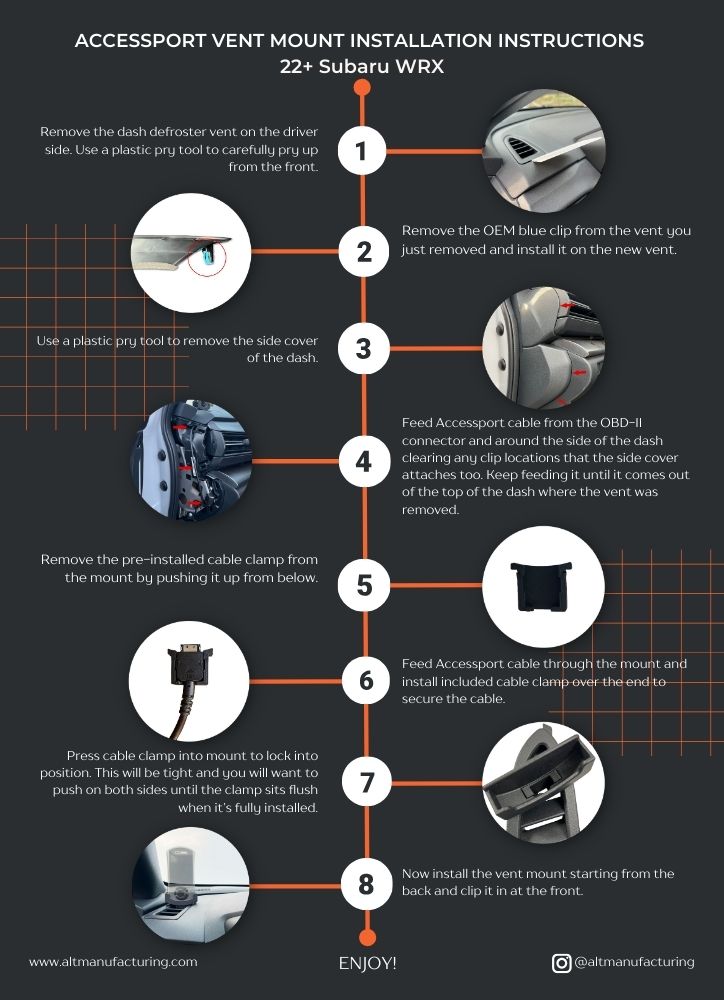
Step 1: Remove the dash defroster vent on the left side. Use a plastic pry tool to carefully pry up from the front.
Step 2: Remove the OEM blue clip from the vent you just removed and install it on the new vent.
Step 3: Use a plastic pry tool to remove the side cover of the dash.
Step 4: Feed Accessport cable from the OBD-II connector and around the side of the dash clearing any clip locations that the side cover attaches to. Keep feeding it until it comes out of the top of the dash where the vent was removed.
Step 5: Remove the pre-installed cable clamp from the mount by pushing it up from below.
Step 6: Feed Accessport cable through the mount and install included cable clamp over the end to secure the cable. (Note: Cable clamp can only be installed one way. Cable should be facing the front and the cable clamp should be on the back of the cable.)
Step 7: Press cable clamp into mount to lock into position. This will be tight and you will want to push on both sides until the clamp sits flush when it’s fully installed.
Step 8: Now install the vent mount starting from the back and clip it in at the front.
Step 9: Insert Accessport and enjoy!